fun-ny Faces : Face-based Augmented Reality with F# and the iPhone X
Each year, the F# programming community creates an advent calendar of blog posts, coordinated by Sergey Tihon on his blog. This is my attempt to battle Impostor Syndrome and share something that might be of interest to the community, or at least amusing...
I was an Augmented Reality (AR) skeptic until I began experimenting with iOS 11’s ARKit framework. There’s something very compelling about seeing computer-generated imagery mapped into your physical space.
A feature of the iPhone X is the face-tracking sensors on the front side of the phone. While the primary use-case for these sensors is unlocking the phone, they additionally expose the facial geometry (2,304 triangles) to developers. This geometry can be used to create AR apps that place computer-generated geometry on top of the facial geometry at up to 60FPS.
Getting Started
In Visual Studio for Mac, choose "New solution..." and "Single-View App" for F#:
The resulting solution is a minimal iOS app, with an entry point defined in Main.fs, a UIApplicationDelegate in AppDelegate.fs, and a UIViewController in ViewController.fs. The iOS programming model is not only object-oriented but essentially a Smalltalk-style architecture, with a classic Model-View-Controller approach (complete with frustratingly little emphasis on the "Model" part) and a delegate-object pattern for customizing object life-cycles.
Although ARKit supports low-level access, by far the easiest way to program AR is to use an ARSCNView, which automatically handles the combination of camera and computer-generated imagery. The following code creates an ARSCNView, makes it full-screen (arsceneview.Frame ← this.View.Frame) and assigns it's Delegate property to an instance of type ARDelegate (discussed later). When the view is about to appear, we specify that AR session should use an ARFaceTrackingConfiguration and that it should Run:
[<register ("ViewController")>]
type ViewController (handle:IntPtr) =
    inherit UIViewController (handle)

    let mutable arsceneview : ARSCNView = new ARSCNView()

    let ConfigureAR() =
       let cfg = new ARFaceTrackingConfiguration()
       cfg.LightEstimationEnabled < - true
       cfg

    override this.DidReceiveMemoryWarning () =
      base.DidReceiveMemoryWarning ()

    override this.ViewDidLoad () =
      base.ViewDidLoad ()

      match ARFaceTrackingConfiguration.IsSupported with
      | false -> raise < | new NotImplementedException()
      | true ->
        arsceneview.Frame < - this.View.Frame
        arsceneview.Delegate <- new ARDelegate (ARSCNFaceGeometry.CreateFaceGeometry(arsceneview.Device, false))
        //arsceneview.DebugOptions <- ARSCNDebugOptions.ShowFeaturePoints + ARSCNDebugOptions.ShowWorldOrigin

        this.View.AddSubview arsceneview

    override this.ViewWillAppear willAnimate =
        base.ViewWillAppear willAnimate

        // Configure ARKit
        let configuration = new ARFaceTrackingConfiguration()

        // This method is called subsequent to `ViewDidLoad` so we know arsceneview is instantiated
        arsceneview.Session.Run (configuration , ARSessionRunOptions.ResetTracking ||| ARSessionRunOptions.RemoveExistingAnchors)
Once the AR session is running, it adds, removes, and modifies ARSCNNode objects that bridge the 3D scene-graph architecture of iOS's SceneKit with real-world imagery. As it does so, it calls various methods of the ARSCNViewDelegate class, which we subclass in the previously-mentioned ARDelegate class:
// Delegate object for AR: called on adding and updating nodes
type ARDelegate(faceGeometry : ARSCNFaceGeometry) =
   inherit ARSCNViewDelegate()

   // The geometry to overlay on top of the ARFaceAnchor (recognized face)
   let faceNode = new Mask(faceGeometry)

   override this.DidAddNode (renderer, node, anchor) =
      match anchor <> null && anchor :? ARFaceAnchor with
      | true -> node.AddChildNode faceNode
      | false -> ignore()

   override this.DidUpdateNode (renderer, node, anchor) =

      match anchor <> null && anchor :? ARFaceAnchor with
      | true -> faceNode.Update (anchor :?> ARFaceAnchor)
      | false -> ignore()
As you can see in DidAddNode and DidUpdateNode, we're only interested when an ARFaceAnchor is added or updated. (This would be a good place for an active pattern if things got more complex.) As it's name implies, an ARFaceAnchor relates the AR subsystems' belief of a face's real-world location and geometry with SceneKit values.
The Mask class is the last piece of the puzzle. We define it as a subtype of SCNNode, which means that it can hold geometry, textures, have animations, and so forth. It's passed an ARSCNFaceGeometry which was ultimately instantiated back in the ViewController (new ARDelegate (ARSCNFaceGeometry.CreateFaceGeometry(arsceneview.Device, false)). As the AR subsystem recognizes face movement and changes (blinking eyes, the mouth opening and closing, etc.), calls to ARDelegate.DidUpdateNode are passed to Mask.Update, which updates the geometry with the latest values from the camera and AR subsystem:
member this.Update(anchor : ARFaceAnchor) =
    let faceGeometry = this.Geometry :?> ARSCNFaceGeometry

    faceGeometry.Update anchor.Geometry
While SceneKit geometries can have multiple SCNMaterial objects and every SCNMaterial multiple SCNMaterialProperty values, we can make a simple red mask with :
let mat = geometry.FirstMaterial
mat.Diffuse.ContentColor <- UIColor.Red // Basic: single-color mask
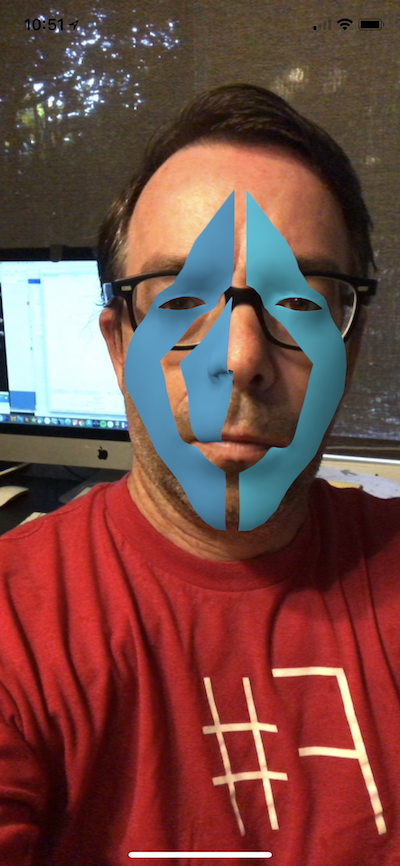
Or we can engage in virtual soccer-hooligan face painting with mat.Diffuse.ContentImage ← UIImage.FromFile "fsharp512.png" :

The real opportunity here is undoubtedly for makeup, “face-swap,” and plastic surgery apps, but everyone also loves a superhero. The best mask in comics, I think, is that of Watchmen’s Rorschach, which presented ambiguous patterns matching the black-and-white morality of its wearer, Walter Kovacs.
We can set our face geometry's material to an arbitrary SKScene SpriteKit animation with mat.Diffuse.ContentScene ← faceFun // Arbitrary SpriteKit scene.
I’ll admit that so far I have been stymied in my attempt to procedurally-generate a proper Rorschach mask. The closest I have gotten is a function that uses 3D Improved Perlin Noise that draws black if the texture is negative and white if positive. That looks like this:
[video src="/uploads/2017/12/perlin_face.mp4"]
Which is admittedly more Let That Be Your Last Battlefield than Watchmen.
Other things I've considered for face functions are: cellular automata, scrolling green code (you know, like the hackers in movies!), and the video feed from the back-facing camera. Ultimately though, all of that is just warm-up for the big challenge: deformation of the facial geometry mesh. If you get that working, I'd love to see the code!
All of my code is available on Github.
